No matter if you're a beginner or an experienced photographer, there are many terms you might hear. These phrases include hard vs. light, CMYK or Dots Per Inch and many others.
Hard light vs. Soft light
Photography is all about choosing between soft or hard light. While soft light gives off a warmer and more pleasing aesthetic, hard light looks more intense. It is worth understanding the differences between soft light and hard light, whether you are a professional photographer.
Soft light is produced by a larger light source that is located closer to the subject. This produces a diffused light. Contrary to hard light, soft lighting will not cast shadows on the subject's face.
Because it is flattering to the skin and face, soft light is great for portraits. It also minimizes wrinkles making the image look more natural.
CMYK
CMYK refers to a colour scheme that uses four primary color for printing photos. This is in contrast with RGB, which uses three colors of light to create images on digital screens.
The CMYK color scheme is not as wide as the RGB color scheme, although it does have a few more colors. Physical inks can be combined with the primary colors, which are cyan, magenta or yellow, to create an enormous variety of colors. This is the core of the printing business.
RGB color schemes are much more sophisticated. The RGB color scheme allows true-to life colors to be displayed on monitors. The colors are created using light. The RGB color scheme also allows for millions of shades to be mixed together. The color scheme can be used on TVs, webs, and even your computer screen to create color.
EXIF data
EXIF information can help professional photographers or amateurs learn how to better take photos. It is often displayed beside a photograph on a website. EXIF data can tell you a lot more about the photo as well as how it was taken.
By studying EXIF data, you can learn how to adjust your camera settings and take better photos. You can also learn from others' techniques, and get a sense of the right balance of settings for your camera. This information can be used to grow your following and build your business.
Gobo
Gobo can add drama and texture in photography. Gobo is a great way highlight the eyes or mouth. It is also a great tool for livening up dull backgrounds.
Gobos are made from either cardboard or cloth. The material you use should have enough translucency to allow you to see the shadows. There are also textured glasses that can be used to cast different levels. The hanging of lace can help create a subtle shadow texture.
Gobos should not be used in conjunction with traditional lighting. A light clamp or light stand should be used to secure the Gobo.
8x10 format
A 8x10 Camera might be right for you, no matter if you're new to the hobby or looking to upgrade. A 8x10 camera can be moved more easily than a 5x7 one and can also be used with character lenses. However, you may not get the best results.
Although the 8x10 is the "wow" factor, the camera is still a small format that is not suitable for everyone. 8x10 cameras can weigh twice as much when compared to their 4x5 counterparts. In addition, the depth of field plane is much thinner and requires longer camera movements than a comparable 4x5 camera. Sometimes, stopping down to 8x10 may be necessary.
Dots per Inch
Whether you are an avid digital photographer or a sophisticate of the printed word, you should know about Dots Per Inch (dpi). You can learn a lot by doing a little bit of education.
Dots/inch refers not only to the number or dots per square inch printed on your printer but also the metric measurement of the image's quality. While you can print thousands of dots from an inch of film, they won’t look nearly as sharp when viewed on your computer monitor.
Forgotten perspective
Whether you are a beginner or an expert photographer, you should be able to use perspective in your photos. Perspective is a way to create 3D illusions in your photos. It includes converging lines as well as vanishing points and lens distortion effects.
When you have a clear foreground and a foggy background, you will be able to enhance the depth of your photograph. To give your photo depth, you can add layers.
A wide-angle lens can be used to create forced perspective. It will make your subjects appear larger than they actually are in the frame. The background will appear to be far away from the foreground.
FAQ
Is photography a talent
Photography isn't a talent, it's an art form that takes practice, training, as well as experience. You need to practice for years before you can master any part of the craft.
Photographing is a business that requires a plan.
You need to know what type of clients you are looking for and how you can reach them.
You must understand their motivations and who they are. It is important to communicate clearly and convincingly with them in order to convince them to use your services.
This means that potential clients will require you to be well-organized.
Before you approach potential customers, it is necessary to compile a portfolio. You can either create a portfolio digitally with software programs, or print it on paper.
After creating a portfolio you should look for opportunities to present it. You can either approach businesses directly or advertise online.
How can I learn photography on my own?
There are many options for learning how to take great photographs. You have the option to buy a book and attend classes, join an on-line community, or watch YouTube tutorials. It's better to learn the art yourself, if your goal is to take great pictures. This way you can control what goes into each photograph. And you'll continue to improve as long you keep learning.
In fact, one of the best things about digital photography is that you don't even need expensive equipment. All you need to get started is an internet-connected computer and a digital camera. All the rest is up to your imagination.
These are some suggestions to help you get started.
-
Get familiar with your camera's manual settings.
-
Learn the basics of how to use these controls.
-
Photograph lots.
-
Make sure to edit them.
-
Please share them.
-
Keep practicing.
-
Experiment.
-
Consider different angles and perspectives.
-
Use light sources creatively.
-
Practice makes perfect.
-
Never be afraid to fail.
-
Be patient.
-
Have fun
How do you get started in digital photography
When you start out in digital photography, the first thing to consider is which type of camera you will use. You have several options, including DSLRs (digital single lens reflex cameras), point-and-shoot compact cameras, camcorders, and smartphones. Each has its own benefits and features. For example, DSLR cameras offer high-quality images but are typically larger and heavier than other types of cameras. Point-and-shoot cameras tend to be smaller and lighter, and may have automatic settings for specific situations. Camcorders provide excellent video recording capabilities and may also feature still photo shooting modes. Smartphones are small, light, and easy to carry around and offer great image quality and many advanced features such as GPS mapping, music playback, and Internet browsing.
Once you've decided on the type of camera you'd like to buy, you will need to decide whether you would rather buy a used or new one. Cameras that have been used in recent years can often be found for a reasonable price. New models generally cost more because manufacturers spend large amounts of money developing new technology.
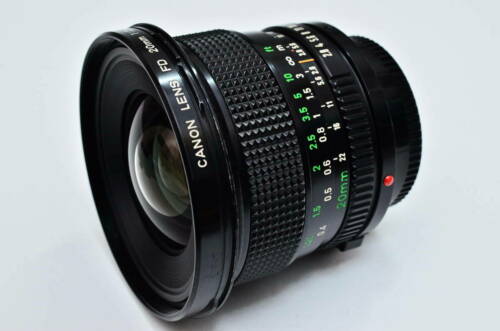
Next, you will need lenses. Lenses play a key role in determining the quality of your photographs. These lenses allow you control the focal length of your lens, which allows you to zoom into the scene and not lose focus. Some lenses include built-in flash units. Others require external flash. There is a wide selection of lenses available from different brands. Each lens has its own characteristics.
Finally, you will need to invest in memory cards. Memory cards save pictures taken with your camera. It can hold hundreds to thousands of photos, depending on how big your card is. Multiplying your memory cards is necessary if you are going to be taking lots of photos.
What camera should I get?
It all depends upon what kind of photographer your goal is to become. For beginners, a simple point-and-shoot is the best camera.
Once you have mastered the basics you will likely need something more advanced. It really is up to you what you prefer.
Before you buy a camera, here are some points to remember.
-
Features: What features are you looking for? Are you going to use autofocus, manual settings, or both? What number of megapixels has your camera? Is there one?
-
Price: How much will you spend? Are you planning on upgrading your camera every two years?
-
Brand: Will you be happy with the brand you select? There is no reason you should settle for less.
-
Functionality: Can you use your camera in low light situations? Are you able to take high-resolution images?
-
Image Quality: How clear and sharp are your images?
-
Battery Life: How much time will your camera last without needing to be recharged?
-
Accessories: Will you be able to attach additional lenses, flashes, etc. ?
Is digital photography hard?
Digital photography is not as simple as it seems. To use digital photography properly, it takes patience and effort. It is important to be familiar with the settings that are best for each type of shot. Experimenting is the best way of learning. Practice makes perfect.
Statistics
- The second easiest way to get blurry photos 100% of the time is to use a cheap filter on the front of your lens. (photographylife.com)
- Get 40% off Adobe Creative Cloud(opens in new tab) (creativebloq.com)
- This article received 13 testimonials, and 100% of readers who voted found it helpful, earning it our reader-approved status. (wikihow.com)
- In this case, 100% of readers who voted found the article helpful, earning it our reader-approved status. (wikihow.com)
External Links
How To
How to take macro photos in photography
Macro photography is the ability to capture small objects, such as insects and flowers, at close range. Macro means large in Greek. If your lens has a focal distance greater than 50mm you can photograph objects that are extremely close up.
A macro lens of high quality should have a large working distance and an aperture fast enough to produce sharp images. Also, avoid moving while taking photos as it could blur your image.
Here are some tips for taking great macro photographs:
-
Use a tripod. A tripod is a must if you don’t already have one. This will reduce the chance that you move when trying to take photos.
-
The right lighting is important. You can get a macro lens with built-in lights filters. However, if you don’t have one, you can purchase one. This prevents excessive exposure.
-
Be patient! Shooting macros takes practice. Sometimes, you may only be able to see a small bug or flower. But it's worth the effort to keep taking pictures until you get it.
-
RAW format is best. RAW files have more data than JPEGs. They can store more detail. Because you can edit the RAW files later, such as cropping or color corrections, they are ideal for editing.
-
The background is important. Even though you've got a nice foreground object, sometimes the background adds interest to your shot. Try to include it in your photo.
-
Keep learning.