Interiors photography is a challenging and often time-consuming art. It requires the expertise of a professional photographer who is skilled in using cameras, lenses, lights, and other equipment. A professional will know how set up an interior shot and how to use post-photography photo processing software.
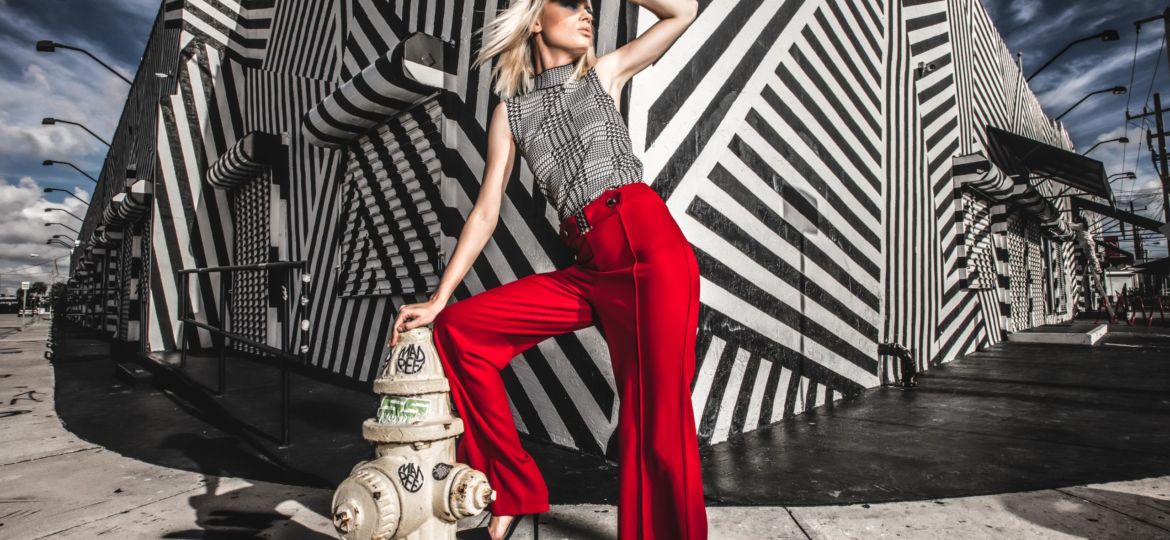
Interiors photography is meant to showcase the design of an architect or designer. To do this, photographers often turn to a wide-angle lens. This allows them to take a picture of a whole room at once, rather than just one part of the room. It is common for the subject to be an architectural detail, like the shape and size of windows or fireplaces.
To photograph interiors, you need to have a camera and lens that can handle long exposures. Interiors photography is particularly challenging because the light levels are not always the same throughout a building. Even though the window may appear darker, the interior view can still be visible. A wide contrast range is another challenge for the photographer. The sensor of a modern digital camera is unable to cope with extreme contrasts between interior and exterior lighting.
Using a tripod is a great way to ensure that your frame doesn't slide off the center. It is best to place your camera squarely on the object that you are photographing if you use a wide-angle zoom lens. A tripod will allow you to hold your camera in a stable position. This will make it easier for smaller apertures to be captured.
It is difficult to get interior photography lines to appear vertical. This is especially true if there is much furniture in the shot or the floor has carpet. Also, if you're taking a picture of a wall, you'll have to pay special attention to the way that the wall will fall into the photo. The horizontal lines of the walls will appear as if they are convergent.
Artificial lighting presents another challenge. Artificial lighting can be helpful but it can also create harsh shadows and glare. It is best to not use the lights if you are shooting interiors. However, the lights can be used to add life and detail to objects.
You should avoid taking interiors photos during the day. If the lamp and ceiling lights are visible in a space, you can reduce their brightness. Consider using supplementary lighting, such as an off camera flash or the light from a window.

Preparing for interior photography can often take hours. You may need more than one shot depending on how large the space is. It's better to have several shots than none.
Final step is to learn how to enhance your photos. Photoshop is an image processing tool that can be used after photo editing to correct color casts or perspective distortions.
FAQ
Is photography a talent
Photography is not a talent but an art form that requires practice, training, and experience. To master any aspect of photography, it takes years of practice and study.
You need to plan how you will make money in photography.
To do this, you need to understand what kind of clients you want to attract and find ways to reach them.
You need to know who they are and what they want. You need to be able communicate clearly and persuasively in order to persuade your clients to purchase your services.
This means you need to be prepared and well-organized when meeting potential clients.
To be ready to meet potential customers, you'll need to build a portfolio. You can do this digitally or on paper.
Once you have created your portfolio, you need to find opportunities to display it. This could be by approaching businesses directly, or even advertising online.
Cameras available for purchase
There are lots of places online where you can buy cameras. B&H Photo Video is a reliable retailer. Their knowledgeable staff can answer any questions that you might have.
B&H ships quickly and securely to make it easy for you to get your order to your door.
You can learn more by watching this video about shopping for cameras.
What makes an excellent camera bag?
Camera bags are essential for protecting your gear during travel. Consider these factors when selecting a bag.
-
To comfortably carry your accessories and camera, choose a large bag. Don't get any bigger than you really need.
-
Durability: Choose bags made from durable materials like leather, canvas or nylon. Avoid plastic and fabric bags.
-
Protection: Make certain your bag is protected against dirt, dust, moisture, and scratches
-
Organization: You can organize your gear by category to make it easier for you to find the right thing. So, you can place your lenses in one box, your memory cards in another and your battery charger in a third.
-
Comfort: Use a shoulder strap to carry your camera instead of a bag. Look for comfortable designs with padded straps.
-
Price: You can shop around to find a great price. Some brands sell their products at discount prices, which can be an added bonus.
-
Warranty: Ask if the company offers a warranty on its products. If your bag is damaged or lost, this will let you know who to contact.
Which Lenses should I Use?
The most frequently asked question by beginners is "What lens should i buy?" There are many options. It can be difficult to make a decision.
The good news is that you don't necessarily need to buy a new lens every time you purchase a new camera. You can simply add lenses later.
These are just three options for lenses that you might consider.
-
Wide Angle Lens: 14mm - 24mm: These lenses provide a wide angle of vision, which allows you to capture more details of your subject. You can zoom in and not lose image quality.
-
Normal/Standard Zoom Lens (28mm - 70mm): These lenses allow you to change focal lengths while maintaining image quality.
-
Telephoto Zoom Lens (70mm–200mm) : These lenses are ideal for photographing distant subjects. They let you focus on your subject even though they appear small in the frame.
These lenses can also be combined to produce different effects. To capture close-up details, you can switch between a normal and telephoto lens.
What is the rule to thirds in photography
The rule of Thirds allows you to create unique compositions with minimal camera settings. It divides your image into nine equal parts, horizontally and vertically. This creates three main areas where you want your subject to appear. These are the top third (the upper left corner), middle third (center), and bottom third (lower right). These areas are useful for positioning your subject in your frame.
The rule to thirds allows you to avoid placing important elements too closely together or too far apart. They might not have enough space to make an impact on the eye if they are placed close together. If they are placed too far apart, it can cause them to lose focus.
Statistics
- By March 2014, about 3 million were purchased monthly, about 30 percent of the peak sales total. (en.wikipedia.org)
- This article received 13 testimonials, and 100% of readers who voted found it helpful, earning it our reader-approved status. (wikihow.com)
- That's the easiest way to get blurry photos 100% of the time. (photographylife.com)
- Get 40% off Adobe Creative Cloud(opens in new tab) (creativebloq.com)
External Links
How To
How to use Lightroom in Photography
Adobe Lightroom, a powerful tool that allows photographers to edit photos quickly. You can import all your images to one location where they can be viewed and edited. You can also print them or share them online.
Lightroom offers editing tools such as cropping, adjusting brightness and contrast, color balance and color balance. It also includes presets that allow you to apply common effects like vignette and lens distortion correction. These changes can be applied automatically when you export your image.
Adobe Bridge is a way to access Lightroom. It lets you organize files and view thumbnails all while browsing your collection. You can even add keywords and phrases to your images so that you can find them later.
Lightroom is free if this is your first time using it. This gives you all the basic features. There are two options for upgrading: you can buy the full edition or subscribe.
Lightroom can downloaded in many ways. Adobe offers the option of purchasing the software directly. Another way to get the software is to download a trial version and then convert it to a licensed copy. Here's how.
-
Lightroom Trial Version
-
Start the program and click the "Convert License" button at the bottom.
-
Choose the type of license you want (one year or perpetual) and enter your payment details.
-
To finish the process click "Continue".
-
Once you've converted the trial to a full-paid license, you are allowed to continue using it for the remainder of the term.