It can be an attractive career choice to work as a travelling photographer. Although the salary ranges between $40,000 to $150,000 annually, there are some costs that you need to consider before you begin your career. Here, you will learn about the licensing fees, benefits, and average annual salary of a traveling photographer. Photography can also bring in a lot of money. These are the most popular fields for photographers. To begin earning, you should be willing to spend time improving your skills and selling yourself as a professional.
Benefits of working as an international photographer
This type of work allows for flexibility and enjoyment by traveling photographers. Their job requires them be adaptable and flexible as the working environment and opportunities change. Some travel long distances while others may work as freelancers for different businesses. While freelance photography can be stressful at times, it's worth it if you have a solid portfolio of work and a positive attitude. The lack of financial stability is one of the downsides to working as a travel photographer.
Travel photographers spend hours researching different places. They carefully select the settings of their cameras and wait for the right moment to click the shutter. This is a great way to increase their knowledge and appreciation for the world. They have the opportunity to meet new people and can potentially be offered additional job opportunities. These experiences can be used to enhance your photography skills. These people might be influential and could lead to new career opportunities.
Cost of licensing fees
A common complaint among photographers is that clients do not want to pay licensing fees. It can range from fifty percent to two hundred per cent of the production fee and usually covers the copyright as well as exclusive use of 10 images during the term of the contract. Most clients are happy to pay this fee. Below are the fees associated with licensing travel photographers. Keep in mind, however, that licensing fees may not cover all expenses.
Many photographers charge their clients for publication licenses or add these costs to their daily rates. It is important to establish clear expectations and terms. Be sure that your clients and bank accounts are full. You'll lose your chances of being paid. It's important to set up the right pricing strategy to avoid this pitfall. It is possible to ensure that clients are happy with the licensing fee and payment plan you have in place. This will also help your bank account stay healthy.
Average annual salary
The average annual salary of a traveling photographer can range anywhere from $242,500 to $17,000. The highest-earning photographers make $199,000. Most earn between $32,500-101,000 per year. A traveling photographer's salary will vary depending on their experience and location. A traveling photographer can earn $16,920 per semaine or $24,250 per annum. Here are some ways to get the most out of your job.
The salary of a photographer who travels depends on many things. There are many factors that influence a travel photographer's salary. These include whether they earn their income on the street, through photo-sharing sites, and if they work for a large company. Their monthly income can vary greatly if they have a large portfolio with high-quality photos. It may be possible to earn an average of $817 per monthly by working as a freelancer in some cases.
FAQ
What equipment is required to start digital photography?
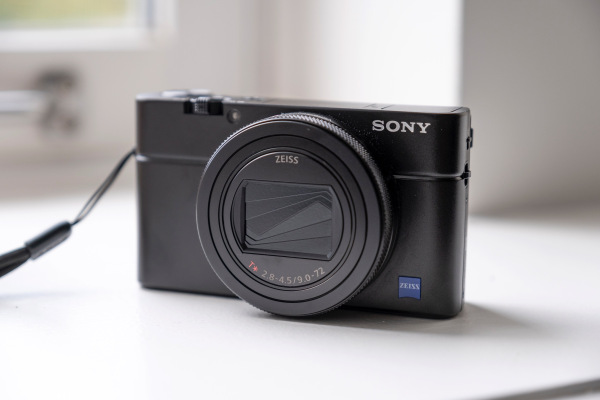
If you are just starting to get into digital photography, the most important thing is to choose which camera you would like. There are many choices, including DSLRs (digital one-lens reflex cameras), point and shoot compact cameras, camcorders, smartphones, and camcorders. Each one has its advantages and disadvantages. DSLR cameras are more expensive and weigh more than other types of cameras. Point-and–shoot cameras can be smaller and lighter than DSLR cameras, and they often have automatic settings that allow for special situations. Camcorders are capable of recording excellent video quality and can also be used to take still photos. Smartphones are small and lightweight so they can be easily carried.
Once you have made your decision on the camera type you wish to purchase, it is time to decide if you want to buy a used one or a brand new one. You can find affordable used cameras, particularly if you bought them in the last few years. New models generally cost more because manufacturers spend large amounts of money developing new technology.
Next, purchase lenses. The quality of your photos is directly affected by the lens. You can adjust the focal length of the lens to allow you to zoom in on the scene without losing focus. Some lenses are equipped with flash units built in, while others require external flash units. A wide range of lenses is available from various brands, each offering unique characteristics.
Finally, memory cards are something you should consider. Memory cards are used to store images taken with your camera. It can hold hundreds to thousands of photos, depending on how big your card is. Multiplying your memory cards is necessary if you are going to be taking lots of photos.
How can I learn photography by myself?
There are many options for learning how to take great photographs. You could buy a book, attend a class, join an online community, watch YouTube tutorials, etc. But if you want to master the art of taking pictures, there's nothing better than doing it yourself! By doing it yourself, you are in complete control of what goes into each shot. And as long as you keep learning, you'll always improve.
In fact, one of the best things about digital photography is that you don't even need expensive equipment. All you need is an internet connected computer and a camera. All else is up to you.
These are some suggestions to help you get started.
-
Learn how to use the manual settings on your camera.
-
Learn the basics of controlling your computer.
-
Take lots of photos.
-
Edit them.
-
These should be shared.
-
Keep practicing.
-
Experiment.
-
You can try different perspectives and angles.
-
Use light sources creatively.
-
Practice makes perfect.
-
Don't be afraid to fail.
-
Be patient.
-
Have fun
Do I Need A Tripod?
This is one those questions that everyone has to ask. The truth is that a tripod isn't always necessary, but it can come in handy.
It helps you keep your camera steady while taking pictures at slow shutter speeds. Tripods can be a huge help when you are shooting landscapes or stationary subjects.
On the other hand, if you're photographing moving subjects such as sports or people, using a tripod can cause blurriness. How do you decide which situations are best served by a tripod.
A tripod is useful when you need to photograph stationary or fast moving subjects. Examples include:
-
Sports
-
People
-
Landscapes
-
Close-ups
-
Macro shots
Do this test to see if you are unsure if you require a tripod. Take your camera and hold it still. Then, look through the scope. You will need a tripod if you see blurred lines and movement.
A tripod will not improve blurring if you don't notice it.
If you do decide on a tripod purchase, these are some things to remember.
-
Smooth legs are important for tripods. This will stop unwanted vibrations shaking your camera.
-
A tripod is a good choice. Some tripods are made of plastic, so they may not be as durable. Consider a tripod made of metal.
-
Buy a remote release. Remote control allows you to remotely control your camera. It can automatically fire the shutter when you press the button.
-
A tripod that can rotate 360 degrees is a good choice. This makes it easier to position your camera vertically or horizontally.
-
Keep in mind that tripods aren't cheap. Expect to spend between $100 and $200. You'll still get a lot for your money.
-
Accessories such as memory cards and filters are important.
-
Before buying online, check with your local store. Many retailers offer free shipping.
-
Read reviews to determine what customers think about a particular product.
-
Ask family members or friends to share similar products.
-
For customer feedback, visit message boards and forums.
-
Find user reviews online.
-
Amazon.com is a website that allows you to compare prices and get customer feedback.
-
Browse photo galleries to get an idea of what photographers do with their tripods.
What Lenses Should I Use
The most common question beginners ask is, "what lens should I buy?" There are many options. It can be difficult to make a decision.
You don't have to buy a brand new lens each time you purchase a new camera. You can instead add lenses later.
These are just three options for lenses that you might consider.
-
Wide Angle Lens (14mm-24mm): These lenses have a wide view angle that will allow you to capture more of your subject. You can zoom in to improve image quality.
-
Normal/Standard zoom lens (28mm -70mm). These lenses allow the user to adjust focal lengths while still maintaining good image quality.
-
Telephoto Zoom Lens (70mm, 200mm): These lenses work well for distant subjects. They allow you to focus on your subject despite the fact that they may seem small in the frame.
Combining lenses can create different effects. Combining lenses can create different effects. For example, a normal lens could be used to capture small details while a telephoto lens is used to capture faraway objects.
Which Camera Should I Buy?
It all depends on your goals and what type of photographer you are. A basic point and shoot camera is enough if you are just starting.
You'll probably want something more advanced once you've learned the basics. Personal preference is the only way to decide.
These are some important things to think about before you purchase a new camera.
-
Features: What features are you looking for? What features do you need? What number of megapixels does the camera have? Is there a lookfinder?
-
Price: How much will you spend? Are you going to buy a new camera every year?
-
Brand: Will you be happy with the brand you select? There's no reason why you should settle for less than the best.
-
Functionality: Can your camera operate in low light conditions well? Do you have the ability to take high-resolution pictures?
-
Image Quality - How clear and sharp is your image quality?
-
Battery Life: How long can your camera last before it needs to be charged?
-
Accessories: Do you have the ability to attach flashes, additional lenses, and so forth? ?
Statistics
- In this case, 100% of readers who voted found the article helpful, earning it our reader-approved status. (wikihow.com)
- Get 40% off Adobe Creative Cloud(opens in new tab) (creativebloq.com)
- There are people out there who will pick at flaws they can only see in 100% crops of your photos. (wikihow.com)
- While I cannot prove that all of those spots were not sensor dust, the photo was taken during a heavy snowstorm…so I guess that 99.8% of the spots are snowflakes. (bhphotovideo.com)
External Links
How To
How to capture pictures under low lighting conditions
Low-light photography refers to taking photos in dimly lit or dark environments. It requires special equipment. The key challenges are in controlling exposure, white balanced, and sharpness. Two types of low-light photography exist: ambient or flash. Flash photography works best when there's enough light around. But if there isn't enough natural light, then you'll have to use a flash. A flash might be necessary if you are photographing a subject indoors and outside. You can also shoot at night when the moon is shining. This will allow you to get nice shadows and colors. Another option is shooting at twilight. Twilight is when the sun sets but there's still daylight.
Long exposures are also an option. You can record images even after the shutter is closed for several minutes. The shutter must be closed so that the camera only records light that hits the sensor. This light will continue to fall onto your sensor after a long exposure. But, the shutter remains closed and no new light enters. The result is that there is very little movement. To ensure clear images, disable any autofocus and exposure settings. Also, make sure that you adjust the ISO setting before you start shooting. An ISO setting of 200 gives you more flexibility to control how bright or dark your image looks. The shutter button should be pressed quickly when you are ready to take the photo. This will bring the shutter completely to a close. Then, you should hold the shutter button until the last possible second. The shutter button should be held down to prevent more light from entering the camera. After you've taken the picture, wait a few seconds before releasing the shutter button. This allows the camera time to process the photo. While waiting, you can check out your photos on your computer screen. Save them once you are satisfied with them.